Investing in a shower filter is one of the best things you can do for yourself. Chlorinated tap water can wreak havoc on your hair when you shower. The chemicals strip the hair shaft of its natural protective oils, leaving you with brittle, lifeless strands, and even breakage. Chlorine also dries out your skin, causing it to feel less soft and increasing dandruff from your scalp.
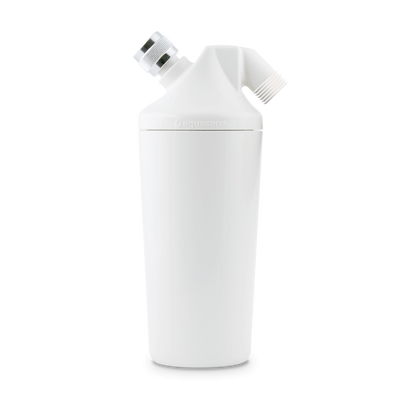
There are several benefits of showering with filtered water, and luckily installing a shower filter is easy. Whether you’ve bought an Aquasana shower filter or are on the fence and want to see if installation is actually DIY, in this post we’ll walk you through how to install a shower head filter in under five minutes. Plus, get a quick overview for how to swap your filter when it’s time for a replacement.
How to install a shower head filter
Installing a shower filter is easy and fast. If you’re a visual learner, we’ve created the following video installation guide for our shower filters below. For those that prefer to read and go at their own pace, we’ve also provided text instructions for the process.
Tools and materials you’ll need
Before you begin, you’ll need the following items:
- NSF certified plumber’s tape
- Pliers
- A bucket
Shower filter installation instructions
Installing an Aquasana shower filter should take less than five minutes. Check out the steps below or consult your owner’s manual for additional details.
Step 1: Unpack & unwrap
Take out all materials from the product box, then remove the black plastic caps on the Aquasana shower filter cartridge. Check that the chrome inlet at the top of the filter has a white rubber washer. If the washer is out of place, press down to avoid leaks.
Step 2: Remove old shower head
Once the Aquasana shower filter is prepped, unscrew your existing shower head from the shower pipe.
Step 3: Filter attachment
Wrap plumber’s tape around the threads of your shower pipe, then attach the chrome collar of the shower filter to the taped shower pipe. Hand tighten the collar by turning it clockwise until snug. Next, use pliers to tighten the filter’s chrome collar an additional ¼ turn. Do not over tighten during this step.
Step 4: Flush
With the shower filter securely attached, turn on the cold water and let it run for two minutes to flush the filter. The water being flushed may appear black initially, so you can put a bucket under the filter to catch the water and pour it out somewhere else. After the water starts to look clear, adjust the temperature to a medium temperature and turn the water on and off three to four times until the water comes out completely clear.
Step 5: Attach shower head
All that’s left now is to screw on the shower head and tighten by hand. If you have a shower filter with a handheld wand, you’ll need to attach the cradle assembly to the filter and then connect it to the hose and wand using included nuts and washers.
Shower filter replacement instructions
Aquasana shower filters last for 10,000 gallons or up to six months. When it’s time for replacement, the process is also fast and easy. Here’s a quick overview of the replacement process:
- Unscrew the filter from the shower pipe.
- Remove the shower head (and wand assembly if applicable).
- Unscrew and dispose of the shower filter’s lower cartridge.
- Take off the cap and label from the new cartridge.
- Screw on the new cartridge to the upper part of the shower filter.
- Reattach the filter to the shower pipe by hand, then ¼ turn with pliers.
- Flush the filter for two minutes until it’s clear, then surge flush by turning water on and off at a medium temperature.
- Reattach the shower head (or wand assembly) to the filter and check for leaks.
Improve your shower water quality with an Aquasana filter
We hope this guide helped walk you through the process of installing and replacing a shower filter. If you haven’t bought one yet or don’t like your current shower filter, our shower filters are independently tested to NSF/ANSI Standard 177 by Pace Analytical Labs to reduce over 90% of chlorine for a better shower experience and healthier hair and skin.
Shop our assortment of shower filters including options with a shower head, handheld wand (in chrome and white), or just the filter so you can continue using your existing shower head.


